If you are moving from a previous version of Mac OSX you would have noticed that the default support for Web Sharing is not available in Mountain Lion. Maybe the reason for this is because of the latest version of PHP 5.4 ships with a built in web server and there is no reason for OS X to ship with a out of the box support.
Although there is no option to Enable Apache from the System Preferences, a copy of PHP 5.3.13 is still shipped with the OS X 10.8 Mountain Lion. Follow along the tutorial to bring the service up and running.
First of all lets bring Apache service on.
Go to terminal.
You can do that by pressing Command + Space to fire up spotlight and then typing Terminal and hitting enter.
Type the following command and hit enter
sudo apachectl start

sudo apachectl start
This should start the Apache service. Once you have the service up and running go to the web browser and type http://localhost to check if it was successful. This should give you the default ‘It works’ page.

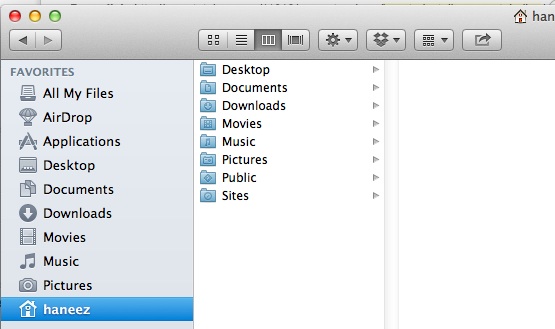
Now lets create the default sites folder similar to what was available in previous Mac OS X versions.

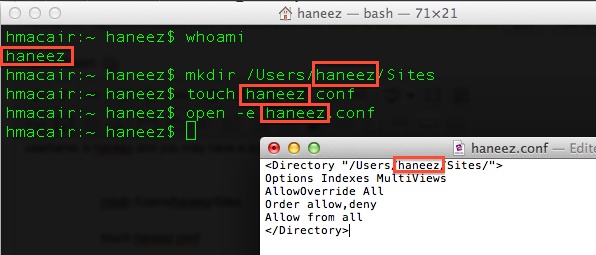
Before you begin you might have to make sure what your username is in its proper case.
You can check the username by typing the following command on the terminal
whoami
Now that you know the username with the proper case type the following commands replacing the username. My username is haneez and you may have a look at the example screenshot below.
mkdir /Users/username/Sites
touch username.conf
open –e username.conf
This should open TextEdit. Go ahead and copy paste the following, replace the username, save the file and exit;
<Directory “/Users/username/Sites/”>
Options Indexes MultiViews
AllowOverride All
Order allow,deny
Allow from all
</Directory>

Once you are done return to the Terminal and type the following command to move the configuration file inside the Apache folder. Make sure to replace the username with your username and also enter the password if prompted.
sudo mv username.conf /etc/apache2/users/
Now lets restart the Apache service to apply the changes we just made.
sudo apachectl restart
If you had followed the steps now you have Apache service running on your mac.
OSX mountain lion ships with PHP 5.3.13 by default. Lets enable PHP support now.
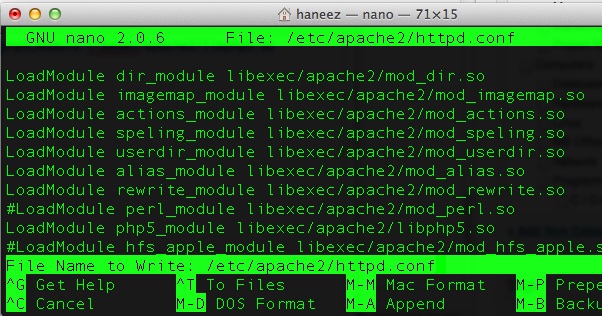
Go back to your terminal and type the following to open the Apache configurations file in the nano editor.
sudo nano /etc/apache2/httpd.conf
Press Control + w to open the search inside the file. Now type the term “loadmodule php” and press enter. It should take you directly to the line where it says “#LoadModule php5_module libexec/apache2/libphp5.so”.
Use the arrow keys to navigate to the beginning of the line and delete the # symbol. Now press Control + o to save the file and control + x to exit from the nano editor.

Its time to restart Apache one last time to load the changes.
sudo apachectl restart
Lets find out if everything works fine.
Type the following command in the terminal with your username instead.
echo “<?php phpinfo();?>” > /Users/username/Sites/index.php
Open your browser and enter your site url. In my case its http://localhost/~haneez/ and it should give you all the information about the current apache, php configuration.
Congratulations! Now you have configured to view your Sites under your user folder with the Mountain Lion’s built in support for Apache and PHP.
ADDITIONAL TIPS :
You may use the following commands if necessary.
sudo apachectl stop
httpd –v
php –-version
Comments are closed.
Is there a way to avoid the username in the url?
example:
from:
http://localhost/~username/myWebSite
to
http://localhost/myWebSite
Use an app like Anvil which is available for free download via anvilformac.com
Hope that helps.